> ## Documentation Index
> Fetch the complete documentation index at: https://docs.unpod.ai/llms.txt
> Use this file to discover all available pages before exploring further.
# Vapi (Dashboard)
> Connect Vapi to Unpod with no code - configure the provider and route a number straight from the Unpod Studio.
This is the **no-code** path. You create a SIP trunk on your Unpod number, copy its
origin-endpoint credentials into Vapi as a **BYO SIP trunk**, then point a Vapi
number and assistant at it. One trunk carries both inbound and outbound calls - no
separate provider setup. Prefer code? See the [API guide](/telephony/integrations/vapi/api).
**You need:** an Unpod number on a Bridge, and a Vapi account (Settings →
**Integrations** access). Calls flow **Unpod trunk ⇄ Vapi** over SIP - Unpod routes
outbound to `sip.vapi.ai`, and Vapi sends inbound to your Unpod endpoint.
## Part 1 - Create the trunk in Unpod
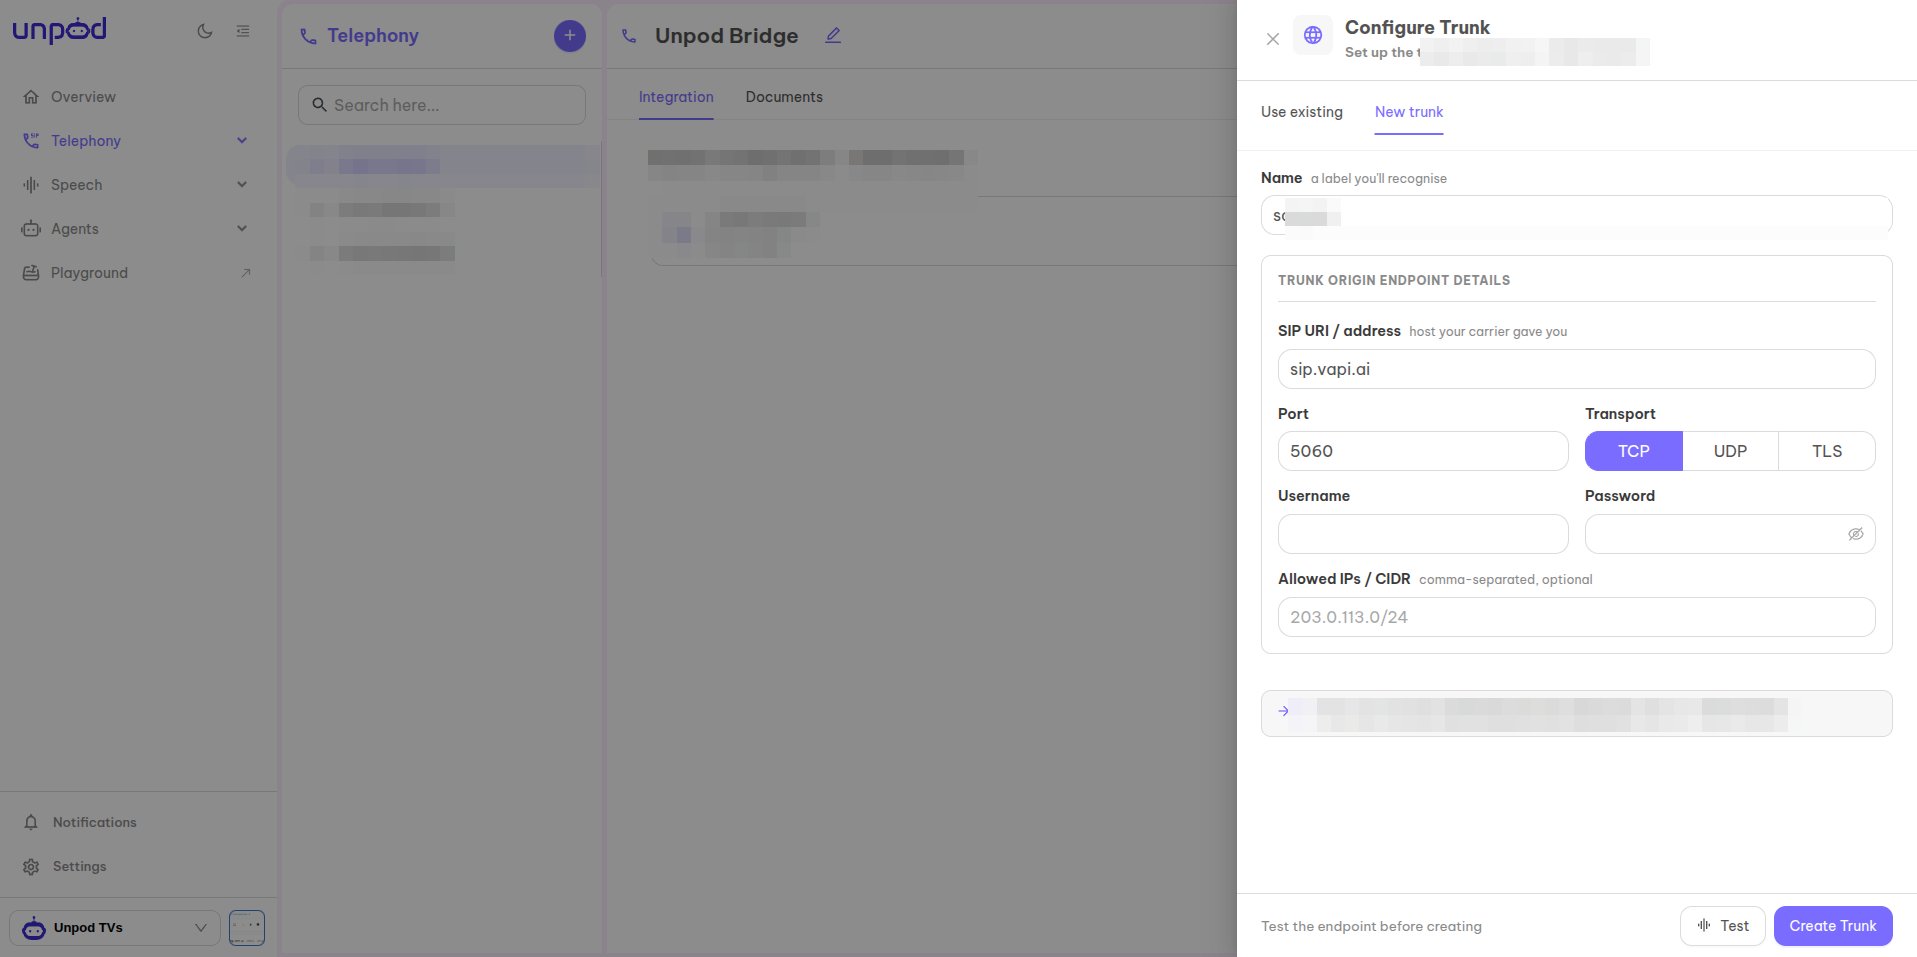
In **Telephony**, select your number and click **Configure**. On the **New trunk** tab,
set a **Name** you'll recognise and the **trunk origin endpoint**:
* **SIP URI / address** - `sip.vapi.ai` (Vapi's inbound SIP host).
* **Port** `5060` and **Transport** (`TCP` / `UDP` / `TLS`).
* **Allowed IPs / CIDR** - optional source allow-list.
Click **Test** to validate, then **Create Trunk**. This one trunk handles **both
inbound and outbound** calls for the number.
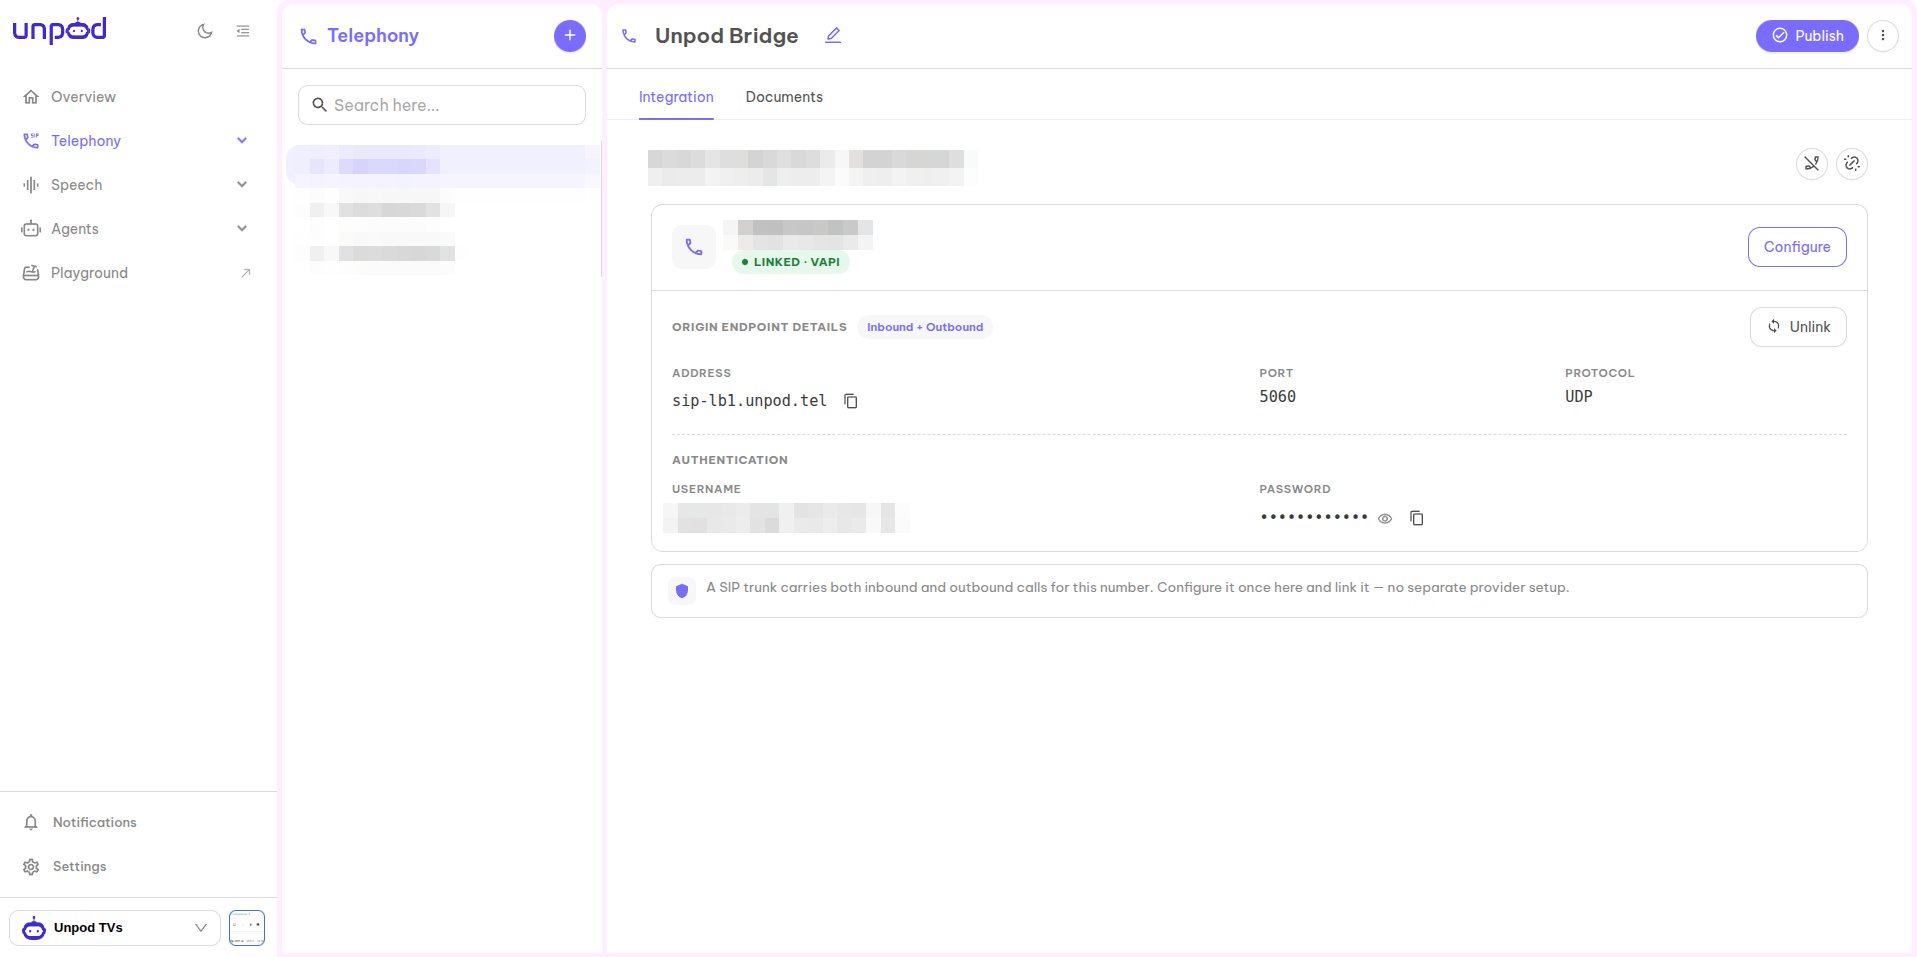
 The number now shows **Linked · Vapi**. Under **Origin Endpoint Details** copy the
values - you'll paste them into Vapi next:
* **Address** - e.g. `sip-lb1.unpod.tel`
* **Port** / **Protocol** - `5060` / `UDP`
* **Username** and **Password** (under **Authentication**)
The number now shows **Linked · Vapi**. Under **Origin Endpoint Details** copy the
values - you'll paste them into Vapi next:
* **Address** - e.g. `sip-lb1.unpod.tel`
* **Port** / **Protocol** - `5060` / `UDP`
* **Username** and **Password** (under **Authentication**)
 ## Part 2 - Register the trunk in Vapi
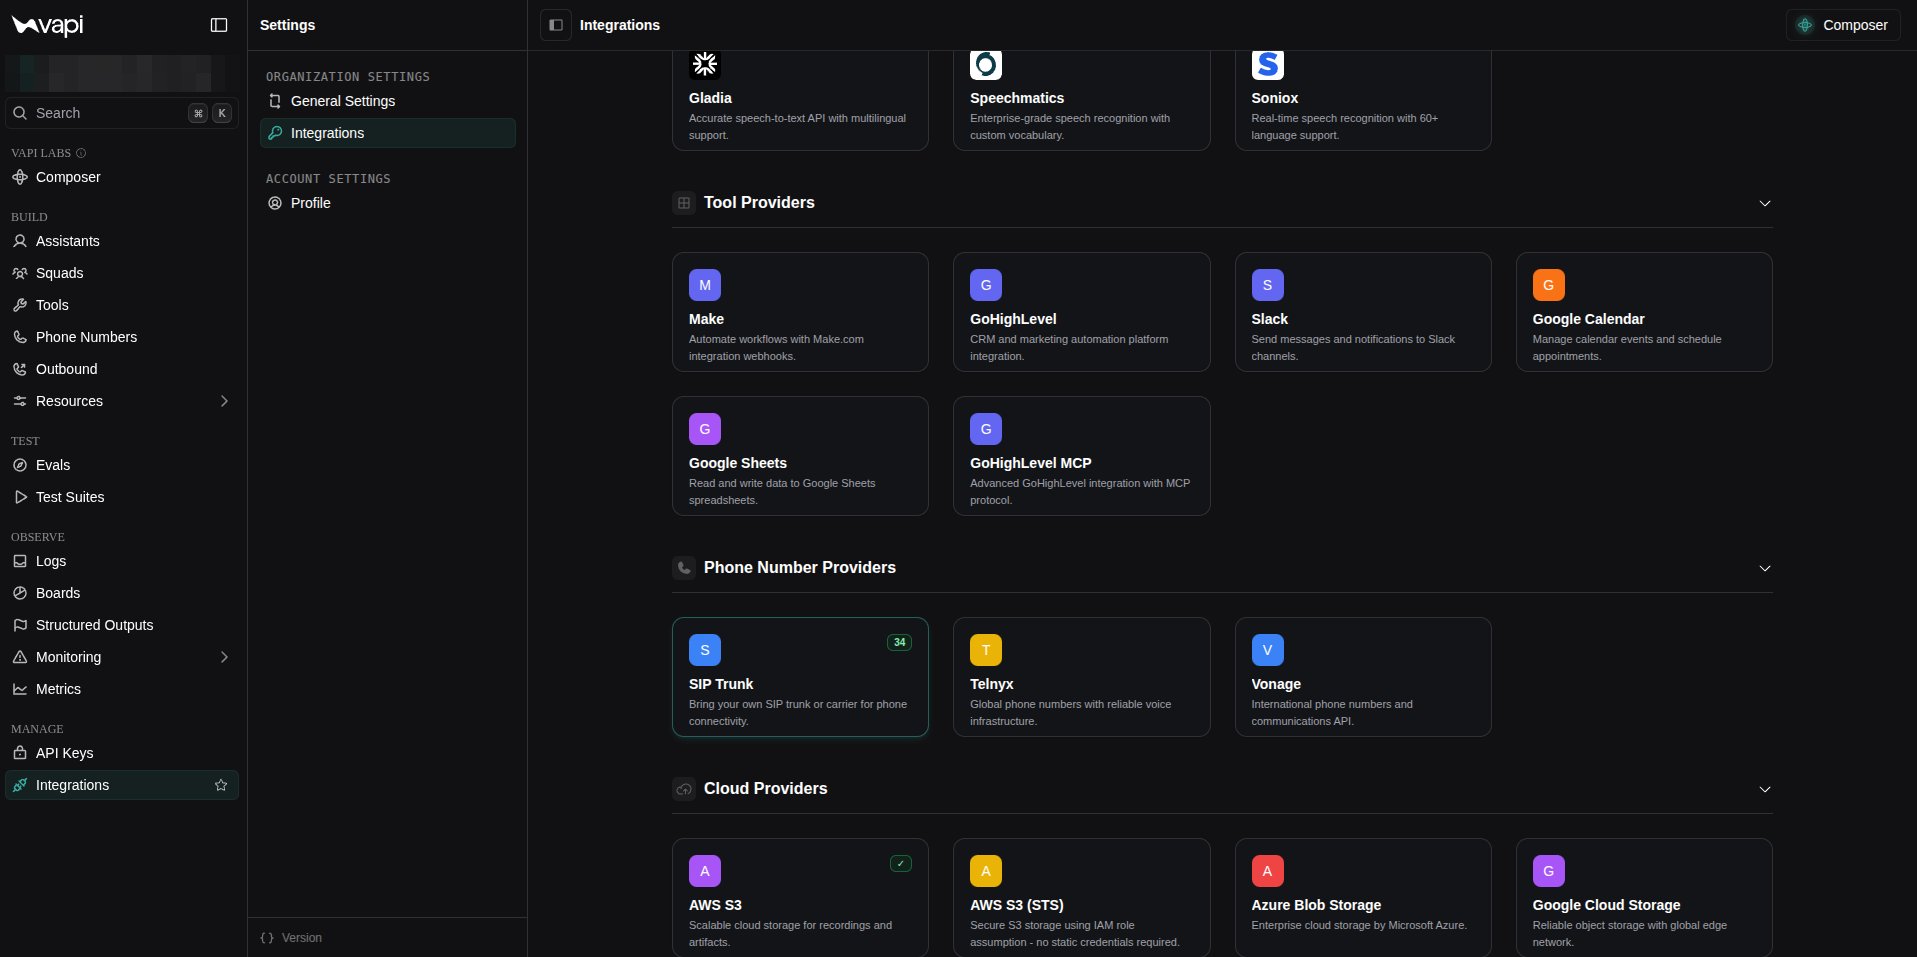
In the Vapi dashboard go to **Settings → Integrations**, then open the **SIP Trunk**
provider under **Phone Number Providers**.
## Part 2 - Register the trunk in Vapi
In the Vapi dashboard go to **Settings → Integrations**, then open the **SIP Trunk**
provider under **Phone Number Providers**.
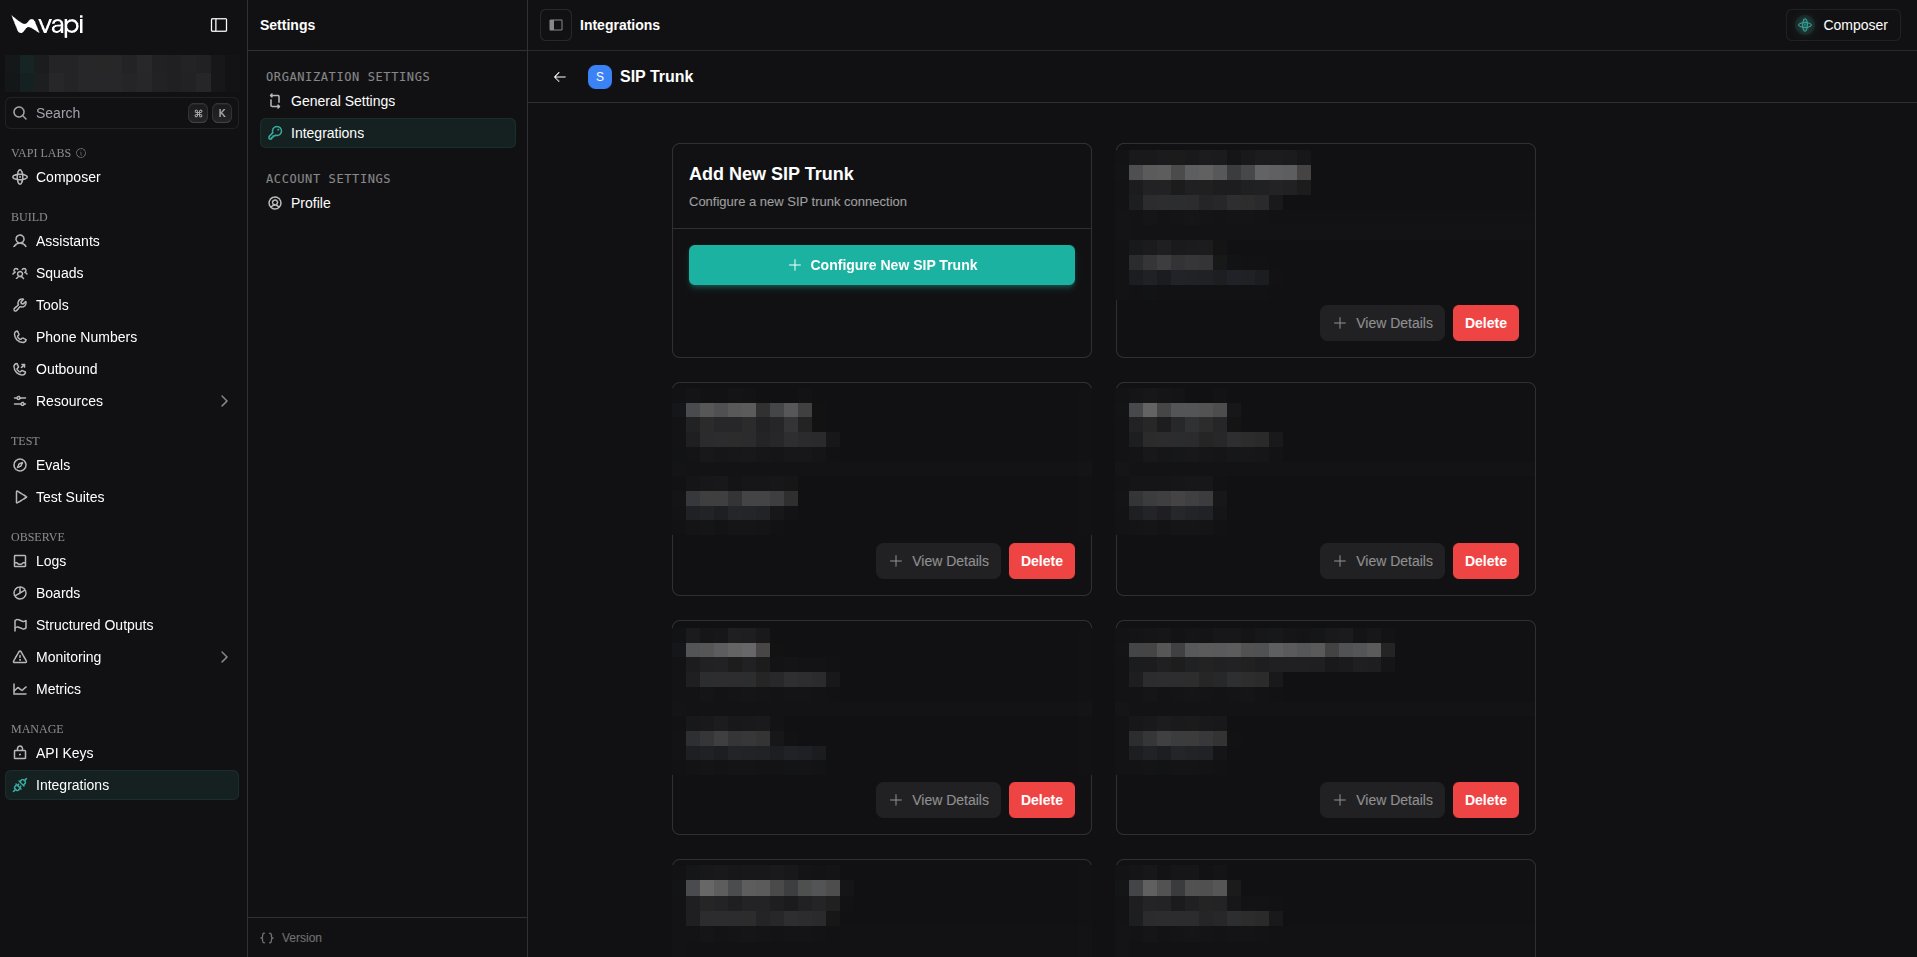
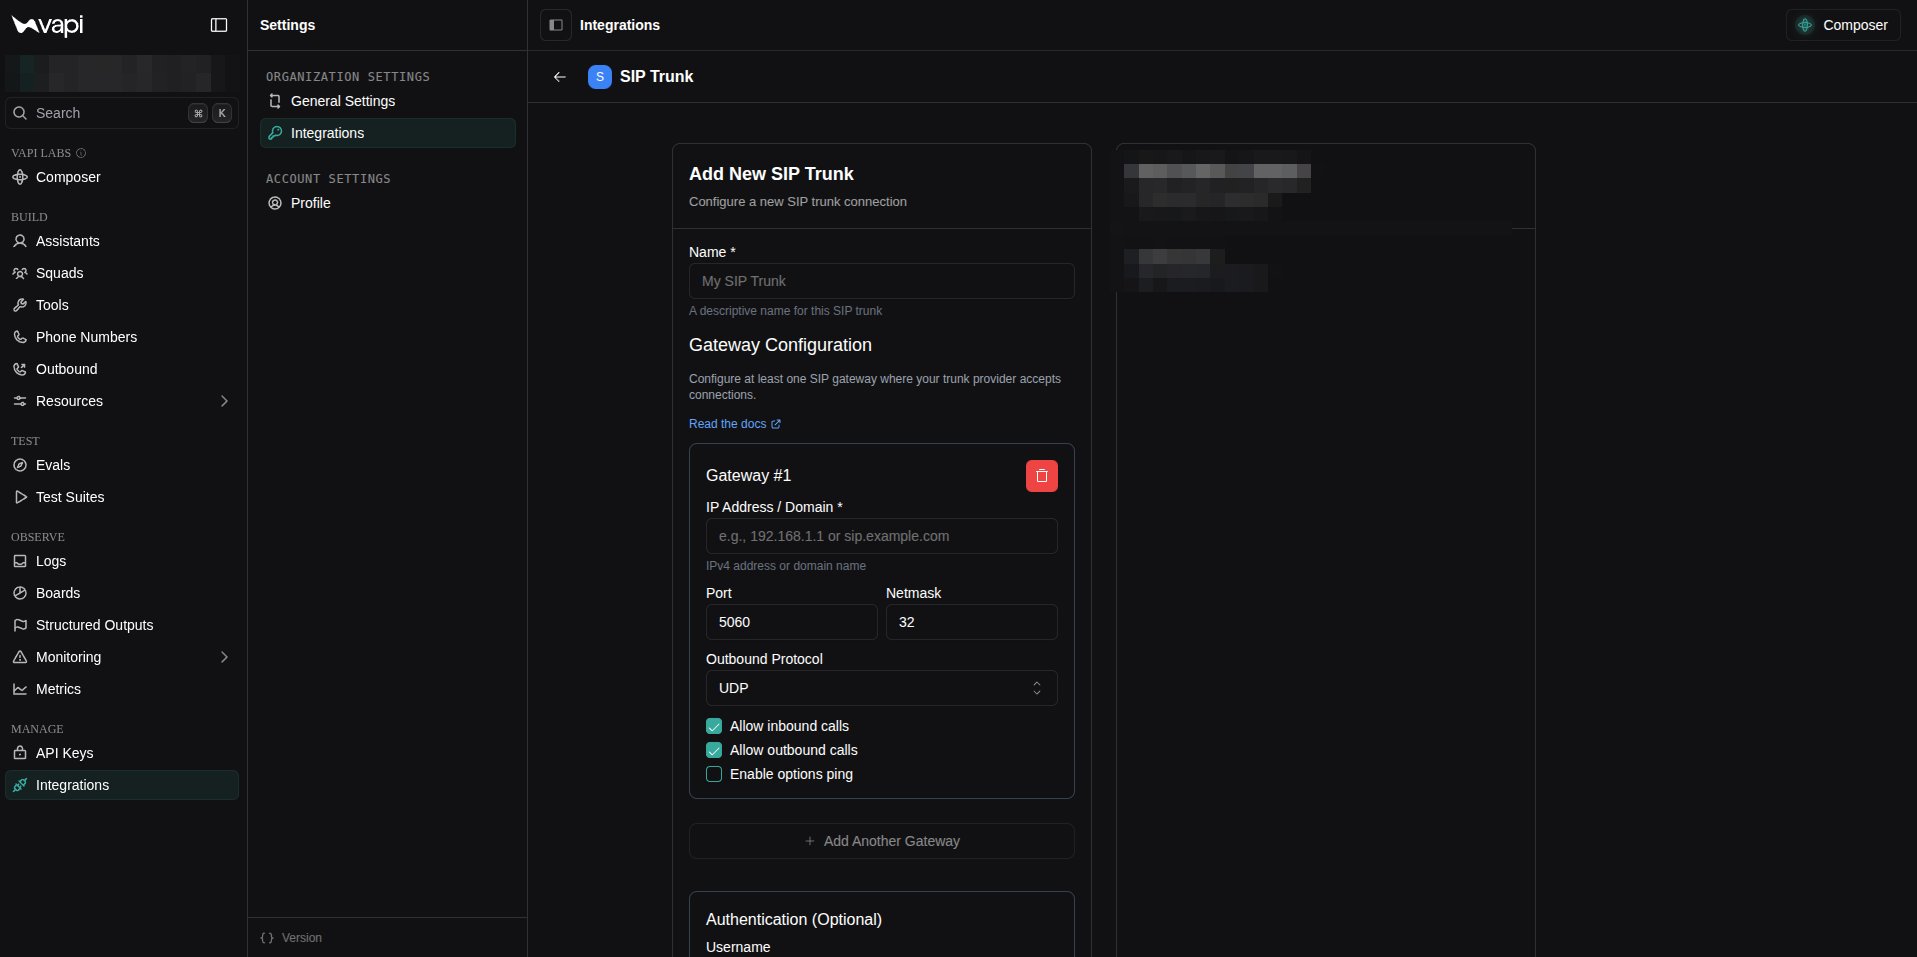
 On the SIP Trunk page click **Configure New SIP Trunk**.
 Give the trunk a **Name**, then under **Gateway #1** enter the Unpod values from Part 1:
* **IP Address / Domain** - your Unpod address (e.g. `sip-lb1.unpod.tel`).
* **Port** `5060`, **Outbound Protocol** `UDP`.
* Tick **Allow inbound calls** and **Allow outbound calls**.
* Under **Authentication**, paste the **Username** and **Password**.
Give the trunk a **Name**, then under **Gateway #1** enter the Unpod values from Part 1:
* **IP Address / Domain** - your Unpod address (e.g. `sip-lb1.unpod.tel`).
* **Port** `5060`, **Outbound Protocol** `UDP`.
* Tick **Allow inbound calls** and **Allow outbound calls**.
* Under **Authentication**, paste the **Username** and **Password**.
 ## Part 3 - Attach a number and assistant
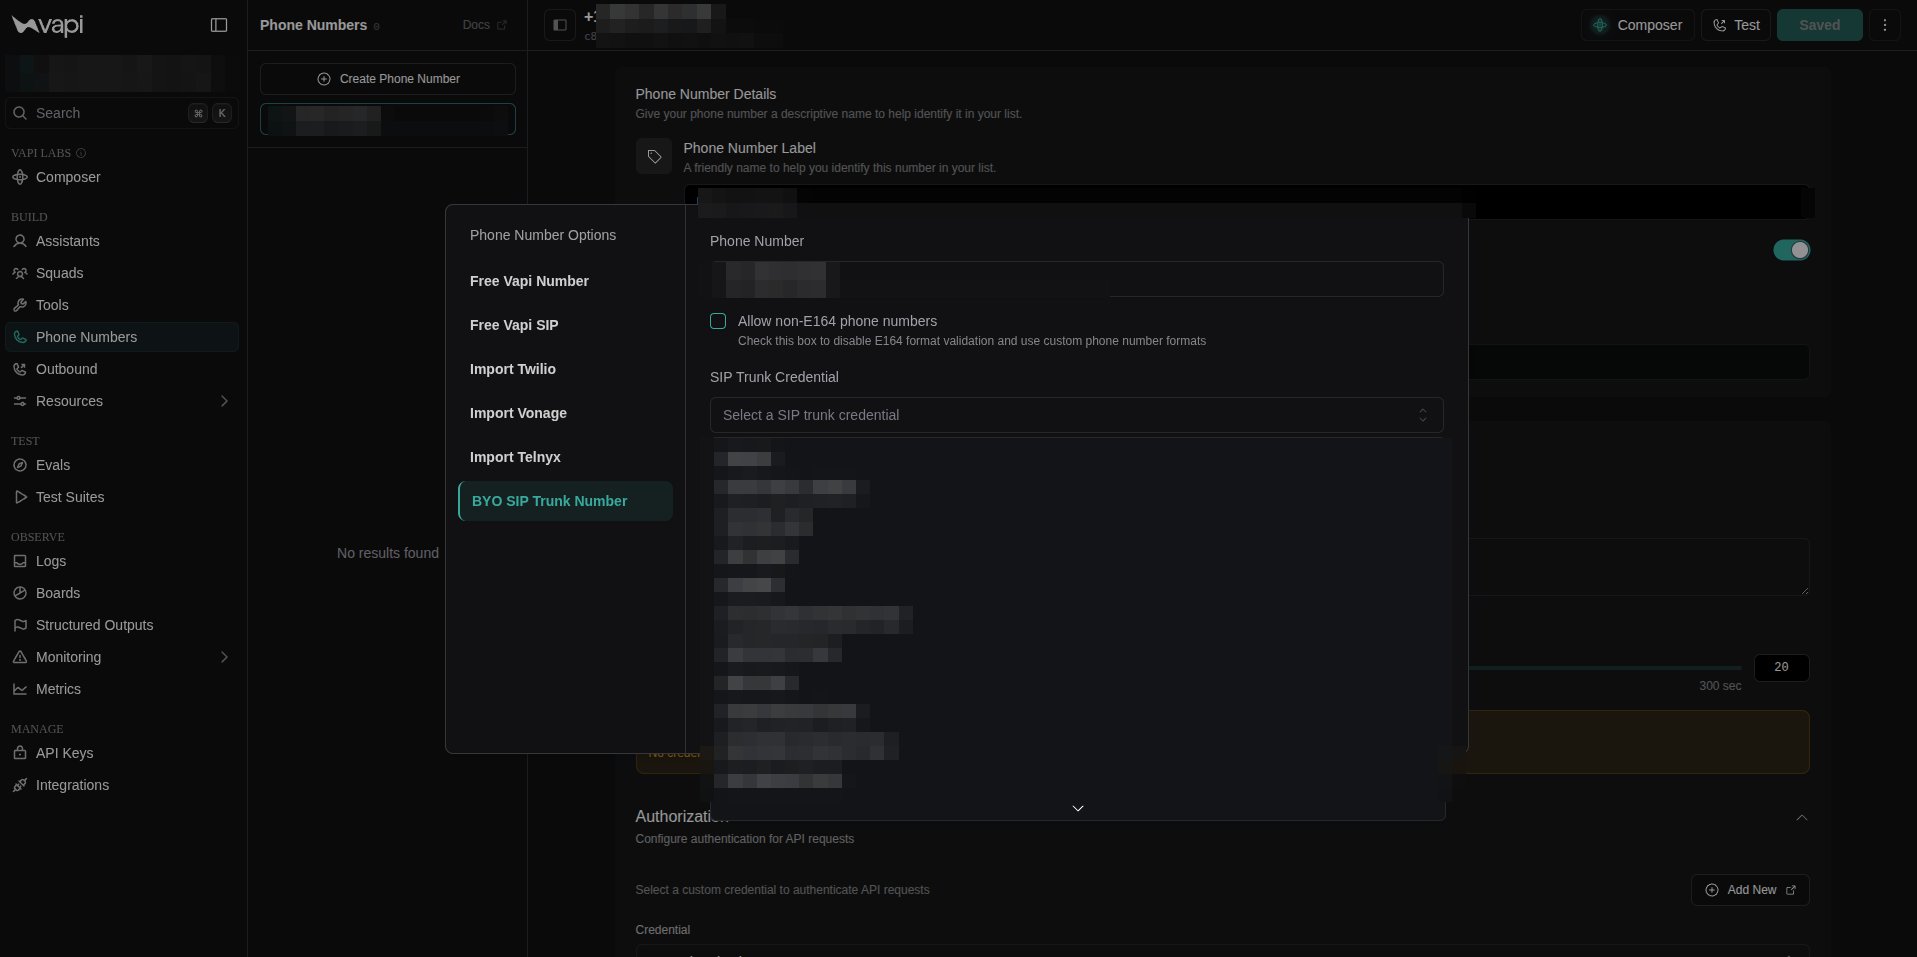
Under **Phone Numbers → Create Phone Number**, pick **BYO SIP Trunk Number**, enter the
phone number, and select your trunk under **SIP Trunk Credential**.
## Part 3 - Attach a number and assistant
Under **Phone Numbers → Create Phone Number**, pick **BYO SIP Trunk Number**, enter the
phone number, and select your trunk under **SIP Trunk Credential**.
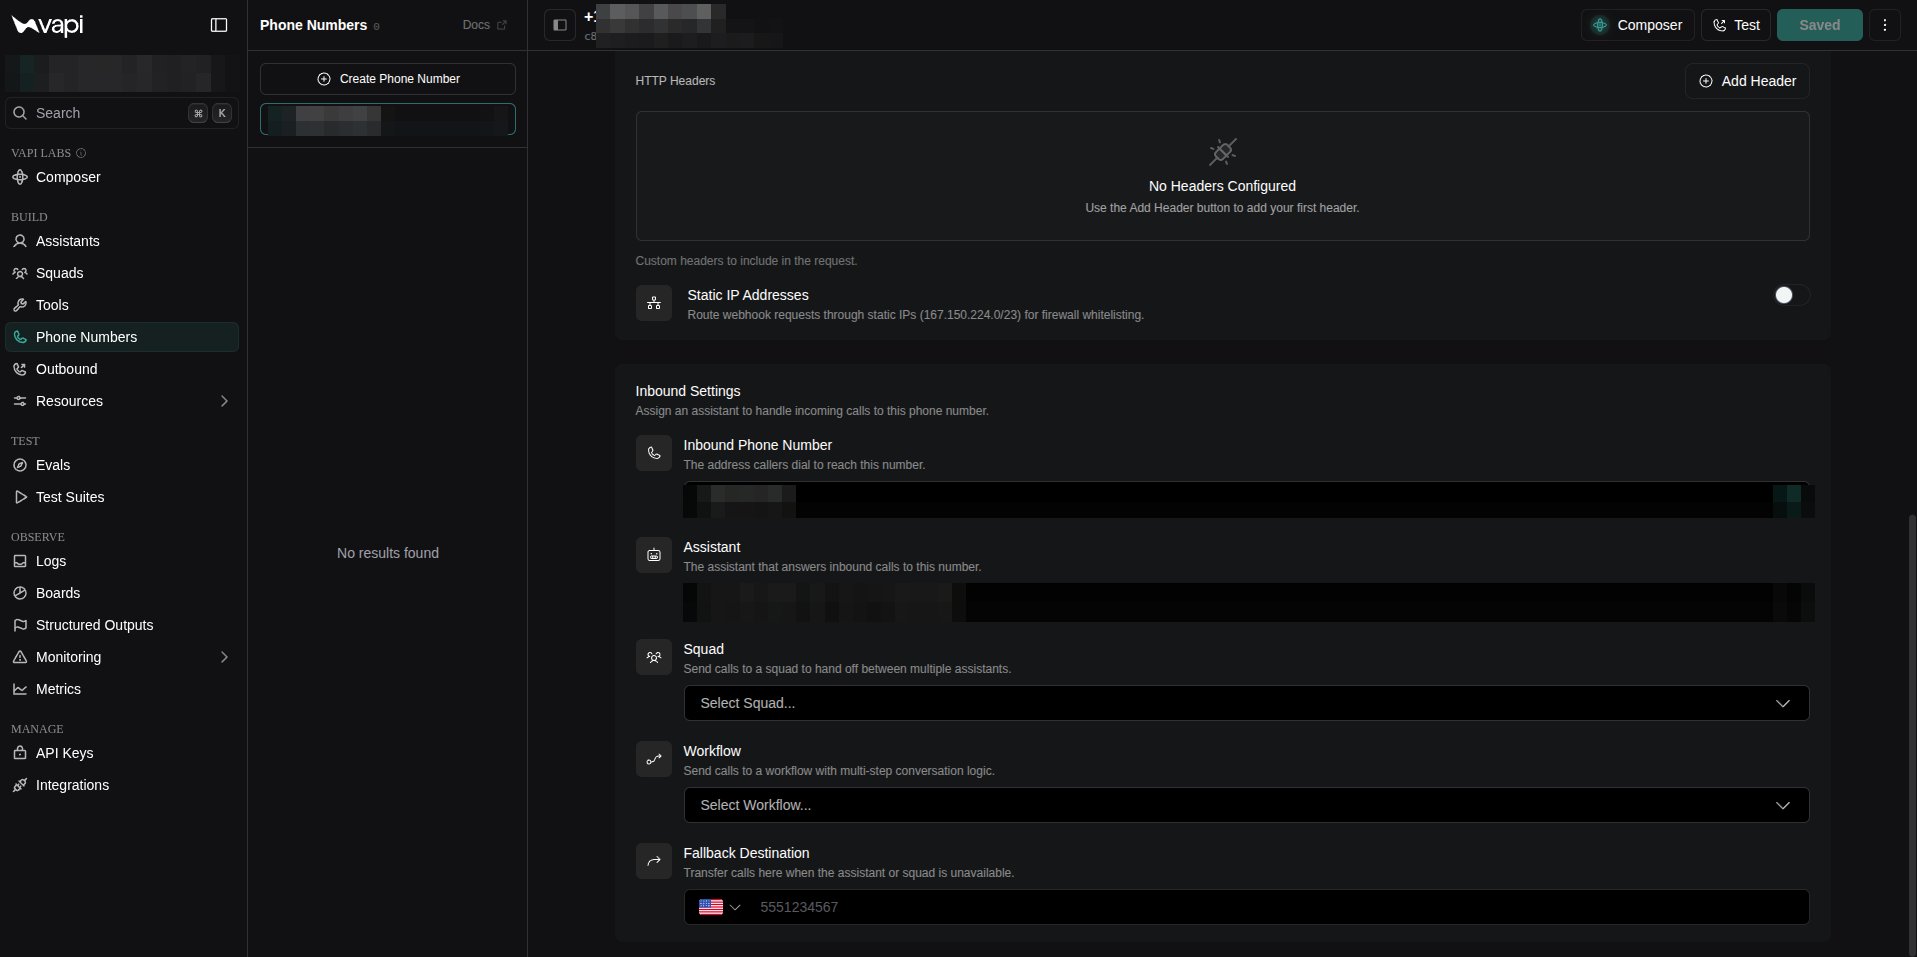
 In **Inbound Settings**, confirm the **Inbound Phone Number** and open the **Assistant**
dropdown.
In **Inbound Settings**, confirm the **Inbound Phone Number** and open the **Assistant**
dropdown.
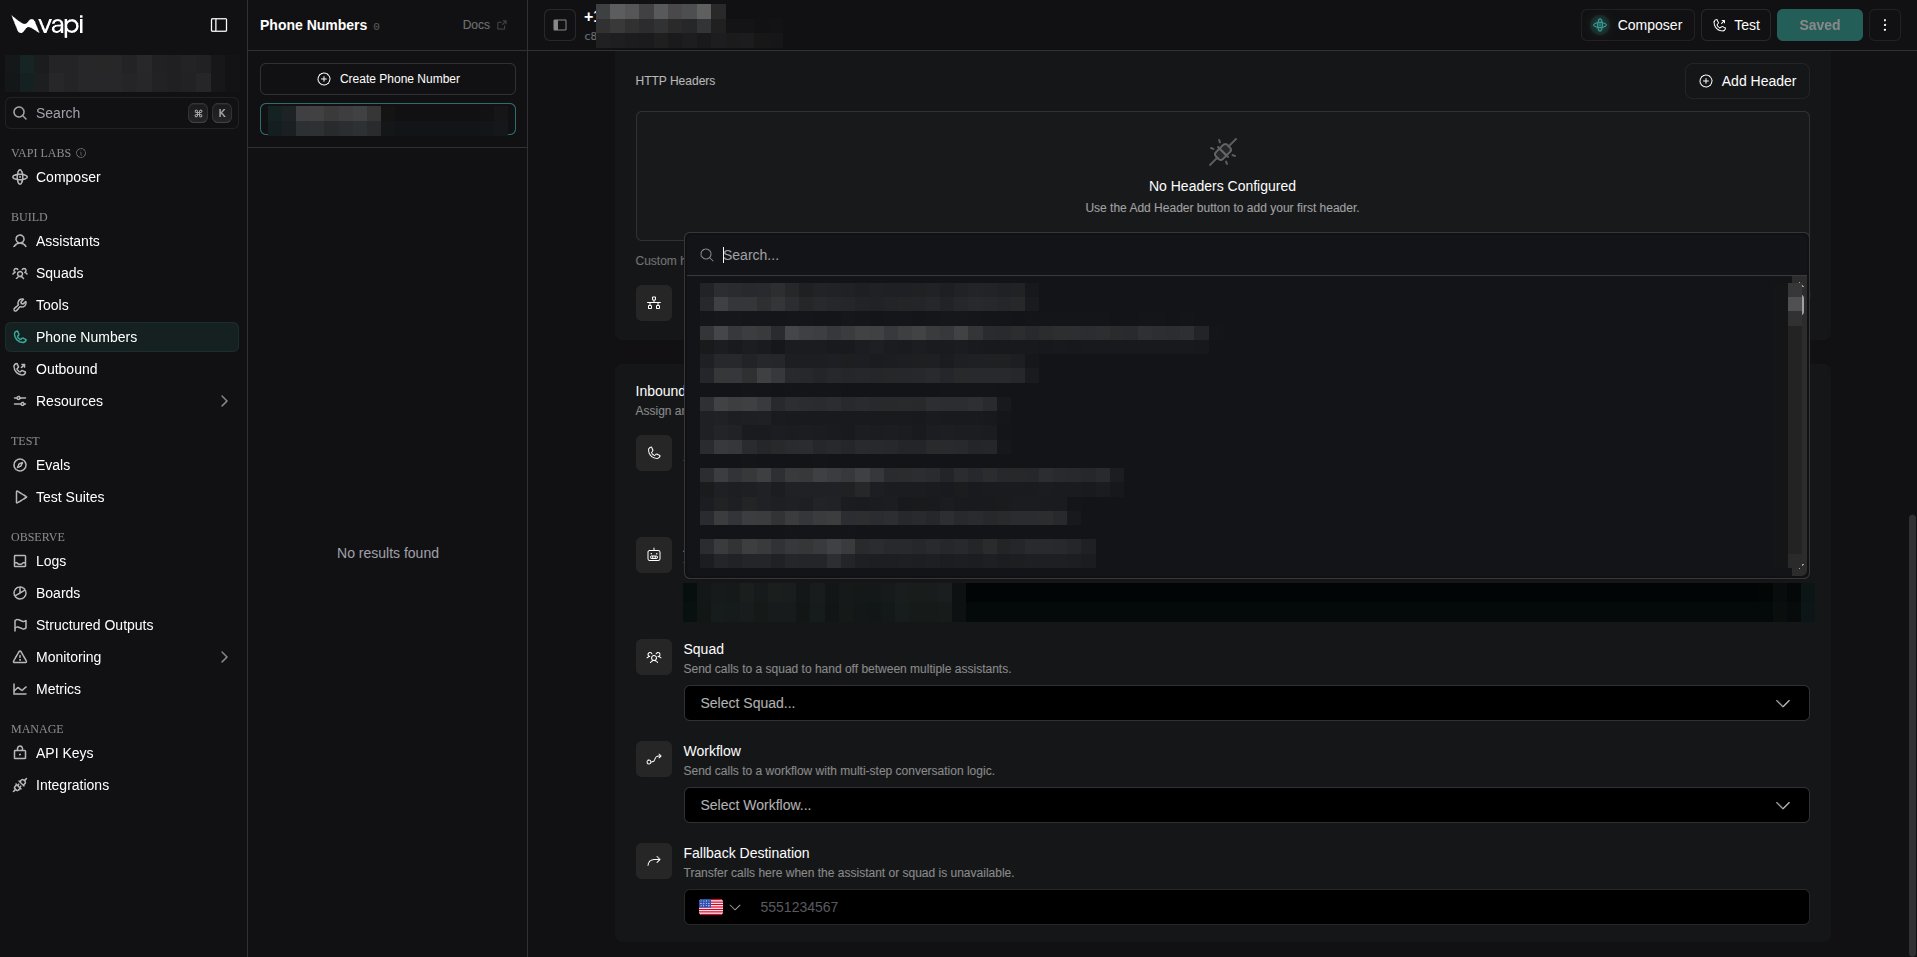
 Choose the assistant that answers inbound calls. (Optionally route to a **Squad**,
**Workflow**, or a **Fallback Destination** instead.)
Choose the assistant that answers inbound calls. (Optionally route to a **Squad**,
**Workflow**, or a **Fallback Destination** instead.)
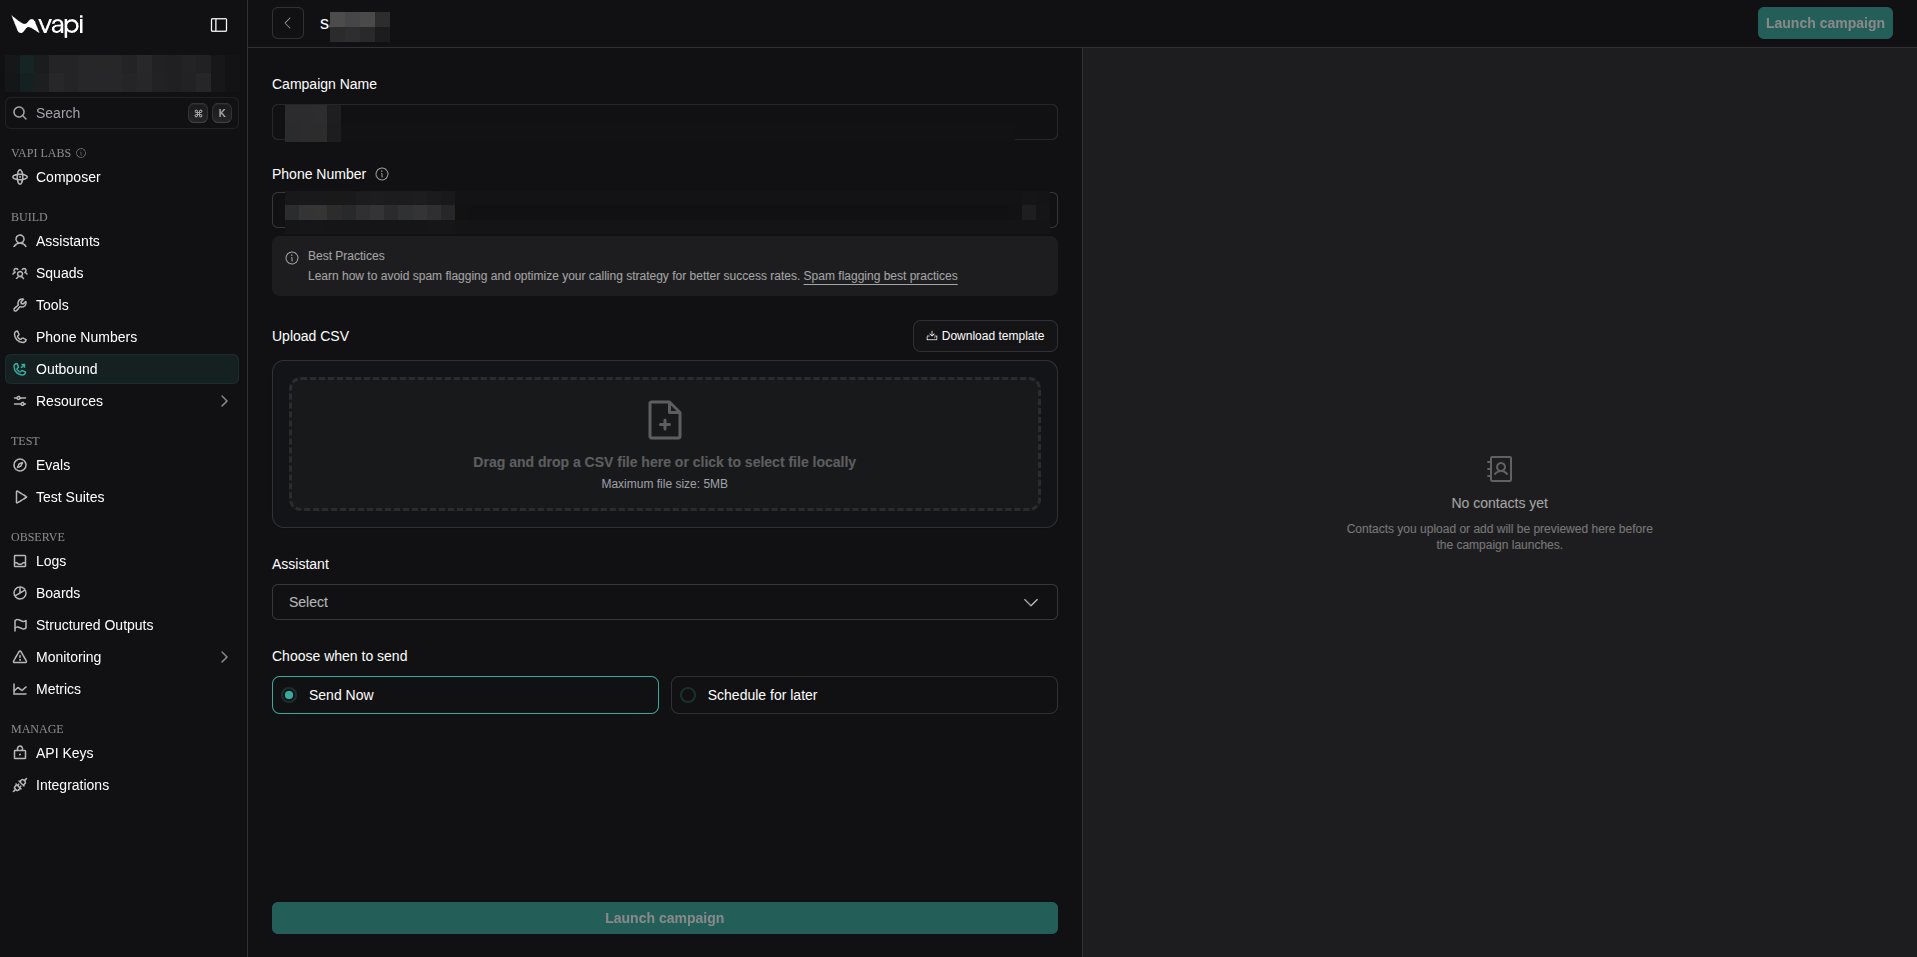
 For outbound, go to **Outbound**, name the campaign, select your Unpod number, upload a
contacts **CSV**, pick an **Assistant**, then **Launch campaign**.
For outbound, go to **Outbound**, name the campaign, select your Unpod number, upload a
contacts **CSV**, pick an **Assistant**, then **Launch campaign**.
 ## Publish
Back in the Unpod Studio, click **Publish** to activate the configuration. The number
is then ready for inbound and outbound calls.
## Troubleshooting
| Symptom | Likely cause | Fix |
| ------------------------------- | ----------------------------- | -------------------------------------------------------------------------- |
| Trunk **Test** fails in Unpod | Wrong SIP URI / transport | Use `sip.vapi.ai`; try `UDP`/`TCP` to match Vapi |
| Vapi can't reach the trunk | Wrong gateway address or auth | Re-copy **Address** + **Username/Password** from the Unpod origin endpoint |
| Call connects, assistant silent | No assistant bound | Set the **Assistant** in the number's **Inbound Settings** |
| Inbound not arriving | Source IP blocked | Add Vapi's IPs to **Allowed IPs / CIDR** on the Unpod trunk |
| Number not reachable | Config not published | Click **Publish** in the Unpod Studio |
Same flow over the REST API.
Back to the integrations overview.
## Publish
Back in the Unpod Studio, click **Publish** to activate the configuration. The number
is then ready for inbound and outbound calls.
## Troubleshooting
| Symptom | Likely cause | Fix |
| ------------------------------- | ----------------------------- | -------------------------------------------------------------------------- |
| Trunk **Test** fails in Unpod | Wrong SIP URI / transport | Use `sip.vapi.ai`; try `UDP`/`TCP` to match Vapi |
| Vapi can't reach the trunk | Wrong gateway address or auth | Re-copy **Address** + **Username/Password** from the Unpod origin endpoint |
| Call connects, assistant silent | No assistant bound | Set the **Assistant** in the number's **Inbound Settings** |
| Inbound not arriving | Source IP blocked | Add Vapi's IPs to **Allowed IPs / CIDR** on the Unpod trunk |
| Number not reachable | Config not published | Click **Publish** in the Unpod Studio |
Same flow over the REST API.
Back to the integrations overview.